TROUBLESHOOTING & TECHNICAL INFORMATION
With over 20 years of industry experience, UES Foils provide transparent and accessible solutions to common challenges for both individual and corporate users through an open platform.
"Feel free to add new questions in the comments section or even better, share your solutions to help other users.
We hope you find it useful."
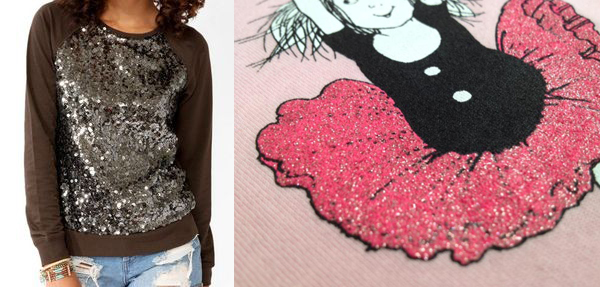
HOT STAMPING FOILS
Hot Stamping Foils have a wide range of applications across various product types today. Its usage continues to expand daily with new additions in industries such as textile, leather, printing, decoration, marble, and furniture etc. Among these industries, textiles and leather stand out due to their widespread use and high consumption volumes. Foils vary in characteristics and application methods.
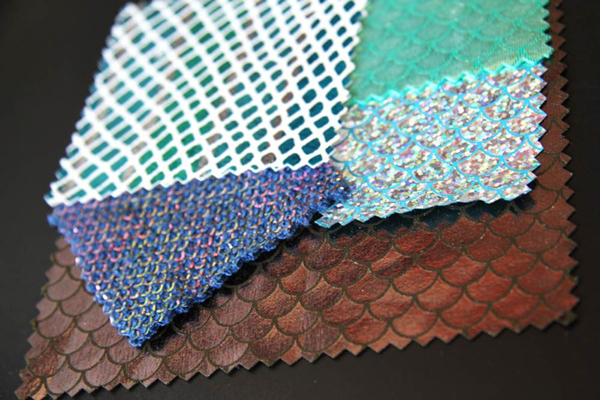
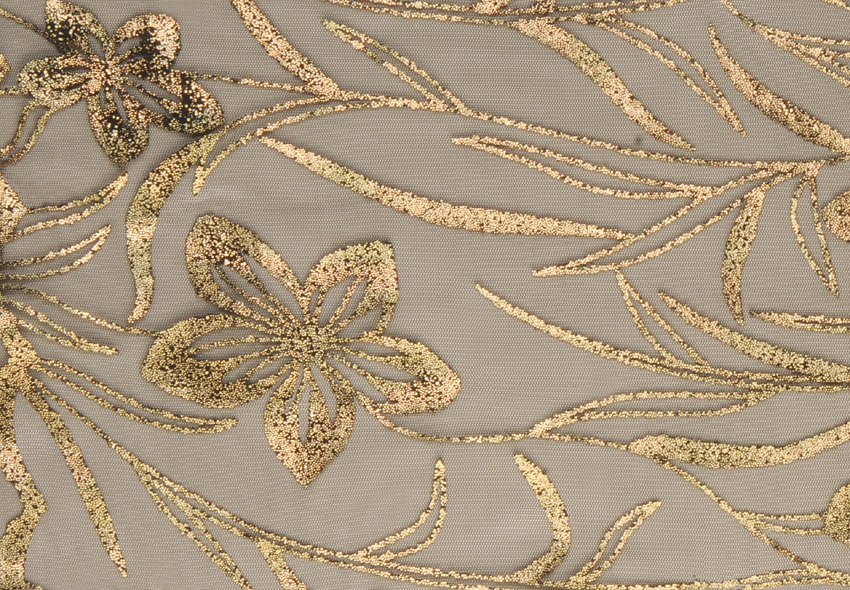
In the textile and leather industries, gold and silver foils were traditionally the first choices. However, these colors alone can no longer meet industry expectations. Foils come in a variety of options including multicolored, gradient effect, patterned metallic, matte, transparent, and many other designs. Metallic or matte powder coatings are applied to a carrier film in foil production generally. Besides powder coatings, foils with different properties can also be produced by applying materials such as polyurethane or thermo-polyurethane onto the film. As seen in their appearance, foils are produced using various chemicals to achieve specific colors and effects. Even within the same effect series, different chemicals may be used to create distinct colors, resulting in unique properties. Additionally, due to the wide variety of fabric surfaces and the desired printing effects, printing conditions often need to be adjusted accordingly. In some cases, achieving a specific print design effect requires multiple printing techniques, which may interfere with one another. For example, excessive heat application can cause metallic foils to fade or lose their shine. Therefore, preliminary testing is necessary to determine the optimal printing conditions.
The criteria outlined below represent the ideal conditions. However, adjustments may be needed when working with adhesives of different chemical compositions or when discrepancies exist between machine settings and actual conditions. Revising and fine-tuning these parameters will ensure the best results.
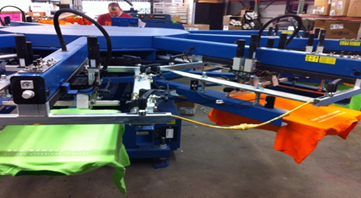
In the textile and leather industries in which foil transfer is widely used, the application process is carried out in two main methods: Roll-to-Roll Printing and Partial Printing.
ROLL-TO-ROLL PRINTING
ROTARY PRINTING
In rotary printing, a suitable adhesive paste (adhesive) is applied to the product surface on which the foil will be transferred. This is done by passing the adhesive through a pre-prepared patterned mesh in the rotary printing machine. The paste is then fixed at an appropriate temperature (145-150°C). Next, in a calender printing machine, the foil is pressed onto the fixed surface at 160°C, 6 bar pressure, and a speed of 3-5 meters per minute. After the transfer process is complete, the fabric is cooled using 4°C rollers at the machine's end line for shock cooling. Finally, the carrier film is separated.
SMOG PRINTING
Smog printing uses a solvent-based adhesive, as it is better suited for this technique. Unlike other methods, the smog printing technique applies the adhesive directly onto the foil rather than the fabric. Using a gravure roller, the adhesive is applied to the foil in accordance with the prepared design. The adhesive-coated surface is continuously fixed along the production line. Simultaneously, the foil is pressed onto the fabric along the same line. Machine speed should be 30 meters per minute for standard designs, 10-15 meters per minute for full-surface coatings. Machine temperature should be 130°C and pressure should be 7-8 bar. After the transfer process, the foil-printed fabric is wound onto rolls and stored at 80°C for 24 hours. The carrier film is then removed from the fabric using a separate machine.
PARTIAL PRINTING
This method is used for printing on garment pieces before they are sewn. In an octopus printing machine, a suitable adhesive paste is applied to the fabric surface through pre-prepared flat screens with the desired pattern. The adhesive is pre-dried at 140°C before the foil transfer process. Heat press: 160°C, 6 bar pressure. (Manual heat press: 6-10 seconds, Conveyor heat press: 20-30 seconds) After pressing, the carrier film is removed in one of the following ways: Cold peel method: The fabric is cooled to 0-2°C for 1-2 minutes before peeling. Room temperature peel method: The fabric is left at room temperature for 1-2 hours before peeling.
The general expectations for foils used in the textile and leather printing industry can be summarized as follows:
- Meeting consumer usage expectations
- Fulfilling technical requirements during the printing process
- Offering a variety of printing effects and easy availability of non-standard colors and patterns
Foils supplied to printing companies and applied to garments are predominantly sourced from Europe and the Far East. Foil manufacturers strive to produce foils that not only meet application and performance standards but also ensure no adverse effects on human health through their technological capabilities.
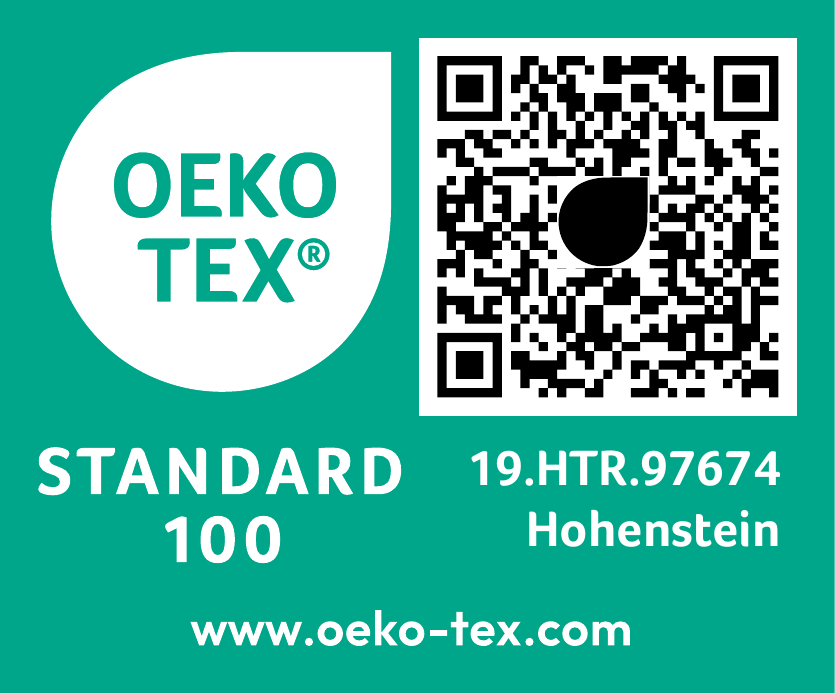
OEKO-TEX STANDARD 100 is a globally standardized, independent testing and certification system for raw, semi-finished textile products and accessories at all processing levels. The STANDARD 100 certification provides targeted product management support for companies in the textile supply chain by ensuring human-ecological product safety, based on a scientific criteria catalog and neutral laboratory testing. For consumers and buyers, the STANDARD 100 product label serves as reliable proof that textile products have been tested according to strict global standards for harmful substances. All foils offered to our customers are certified under OEKO-TEX STANDARD 100 with registration number 19.HTR.97674 on behalf of UES Varak.
Global communication standards are increasingly pushing manufacturers worldwide to comply with specific quality requirements. Therefore, rather than focusing solely on a foil’s country of origin, it is more critical to consider the technology used in its production and the health-conscious approach taken by manufacturers. It is also an undeniable fact that the Far East has become the world's primary production hub.
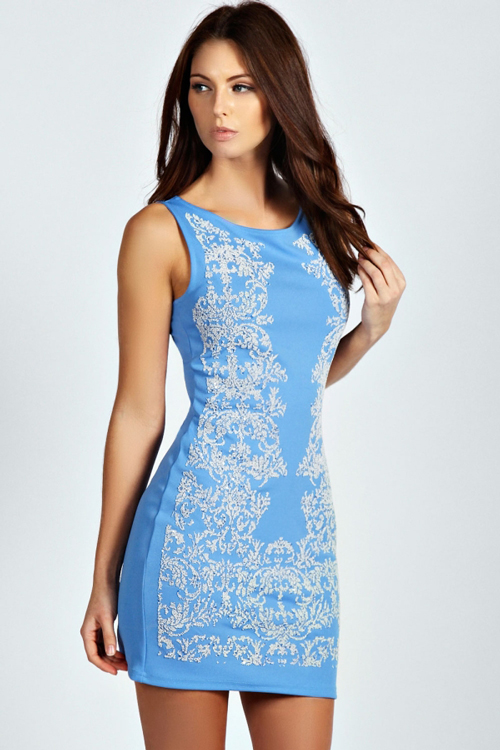
At the same time, competitive market conditions require an optimal balance between price and quality, ensuring that products offer the best value. Traditional gold and silver foils, once industry standards, are no longer sufficient to meet today’s fashion trends. Instead, the demand has shifted toward metallic, matte, and soft shades in a wide spectrum of colors, reflecting nature’s diversity. Beyond standard solid colors, patterned effects integrated into the core printing process are needed to enhance the visual appeal of products. These evolving needs highlight the importance of working with a supplier that not only offers a diverse foil selection but also ensures immediate availability. UES Varak has been serving the printing industry for many years with an extensive range and strong inventory system.
Manufacturers using foils in textile and leather applications should consider these factors and choose high-quality foils that provide various creative possibilities. To evaluate foil printing performance from a quality perspective, the following tests are recommended: Wash fastness tests, Rubbing fastness tests and • Light fastness tests (if required). In addition to these performance tests, UES Foils supports its customers with a portfolio of over 150 solid-color foils in different shades and more than 300 multicolor foil designs.multicolor varak
Foil printing offers manufacturers a high-quality, cost-effective, and user-friendly production method while ensuring ease of application. By selecting the appropriate adhesive, utilizing different techniques, and combining colors and patterns, excellent printing results can be achieved. One of the most significant advantages of foil printing is its environmentally friendly nature. The waste materials and polyester films generated during the process are recyclable, and no harmful emissions are released into the atmosphere. Compared to other printing methods, foil printing is considered harmless. Its non-toxic structure, especially when using water-based adhesives on knitwear, makes it a safe and sustainable choice. This allows foil printing to be confidently used in men’s, women’s, and children’s apparel, home textiles, footwear, bags, and accessories. All foils sold by UES Foils are certified at the highest and strictest Class I level under OEKO-TEX STANDARD 100, ensuring absolute safety for babies.
All foils supplied by UES Varak hold an OEKO-TEX STANDARD 100 Class I certification, which verifies that they are safe for babies and children up to three years old. This means the foils can be used even in underwear, bodysuits, bedding, and mattress covers without any health concerns. Babies require special protection, and under OEKO-TEX® Class I, all baby products undergo the highest level of testing to ensure they are gentle on sensitive skin. This certification guarantees that the final product contains no formaldehyde and meets saliva fastness standards, meaning the dyes or prints will not dissolve or stain if a baby chews on the textile material.

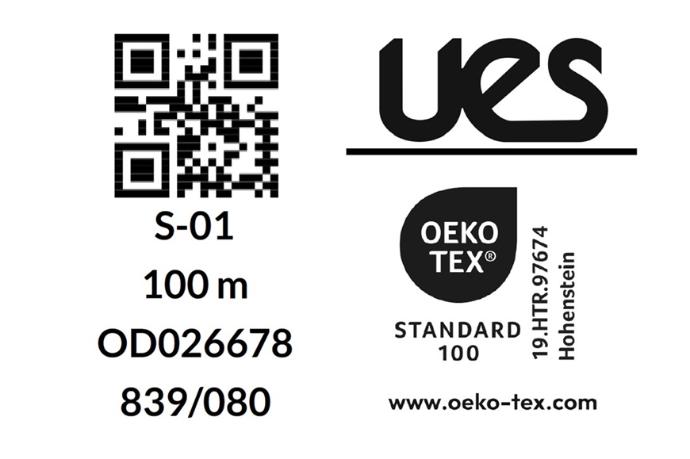 Each 21,000-meter foil roll is produced under identical manufacturing conditions, ensuring that quality and technical criteria remain consistent within this quantity. After production, foils are divided into seven separate jumbo rolls of 3,000 meters each, which are then imported in this form. Upon customer request, these jumbo rolls can be rewound into smaller rolls of 100 or 500 meters for sale. Each newly wound roll is assigned a unique barcode, allowing it to be distinguished from other foils of the same color or pattern that may be wound later. The batch, lot, and barcode information is displayed on the product label and can be used for quality control when necessary. Additionally, the barcode—also available as a QR code—enables tracking of the foil throughout all stages, from production to customer delivery.
Even though foils are produced using the latest technology in modern manufacturing facilities, they remain highly sensitive to external factors such as temperature, humidity, and other environmental conditions. As a result, even slight changes during production can impact quality factors within certain tolerances. Different production batches may have minor variations in color and pattern, even at low levels. Therefore, once foil printing begins, it is recommended to complete the production using foils from the same batch to ensure more consistent results. At UES Varak, the Quality Control System ensures that products are shipped from the last batch previously purchased by the customer or if unavailable, from the closest matching batch. In cases where there are significant differences (such as color or transfer firmness), the customer is notified and if the variation can be managed within production conditions, awareness is raised to prevent potential quality issues.
Before mass production, sample prints must be prepared and standardized within the production environment. Once the sample is approved by the customer, full-scale production can proceed. It is common for sample prints to appear lighter, more matte, or glossier than the final production, often due to operator skill level and differences in sample preparation equipment. To minimize inconsistencies, the operator must match the press temperature, pressure, and transfer speed during sample preparation to the actual production conditions. Additionally, once a sample is approved, it is best to use foil from the same batch for full production. Failure to follow these critical steps may result in color tone variations and unexpected visual effects between the sample and the final production.
In the textile printing industry, foil-coated productions are generally carried out using two different methods and machine types:
- Roll-to-Roll Printing Machines (Smog / Rotary / Calendar)
- Partial Printing Machines (Vertical Presses / Belt Presses)
The foil requirements for roll-to-roll and piece printing differ in terms of structure, form, and quality. The two most commonly used types of foils are powder foils and total foils, which have distinct characteristics.
Total Foils consist of a colored polyurethane layer attached to a carrier film. This type of foil is designed for full-surface coating, meaning the polyurethane layer must be entirely transferred to the target surface. As a result, total foils cannot be used for patterned designs on adhesive layers and are therefore only suitable for roll-to-roll printing. They cannot be used in piece printing.
Powder Foils, on the other hand, have metallic or matte powder dye particles adhered to the carrier film. During transfer, these powder particles can independently adhere to the patterned adhesive layer on the surface, allowing for easy application of intricate designs. This makes powder foils suitable for both roll-to-roll and piece printing, as they provide greater design flexibility.
Beyond foil type, physical conditions and adhesive selection also differ between the two printing methods. Partial printing typically requires plastisol adhesives, which require higher curing temperatures. Roll-to-roll printing often uses water-based or solvent-based adhesives, which do not require high-temperature resistance from the foil. Water-based adhesives, commonly used in partial printing, tend to have more critical wash fastness requirements. Solvent-based adhesives generally perform better in wash durability tests.
Partial printing requires smaller foil rolls due to shorter print runs. To enhance material handling efficiency, these foils are typically wound onto smaller 2.5 cm diameter rolls. Roll-to-roll printing, which consumes longer foil lengths, requires more durable 7.5 cm diameter rolls to ensure smooth processing in printing machines.
At UES Varak, we understand that our customers have diverse requirements. That’s why we prioritize both quality and product diversity, ensuring that our foils meet different structural and format needs. Upon request, we can customize foil roll sizes and cuts to match specific production requirements.
In foil printing, achieving high durability while maintaining a bright and eye-catching appearance is crucial. To ensure long-lasting results, the printing process must be executed with precision. The following key factors must be carefully balanced and controlled during printing to achieve optimal gloss and durability:
- Foil
- Foil Adhesive (Pat)
- Press Pressure & Speed/Duration
- Press Heat Transfer
Heat plays a critical role in foil printing by ensuring the uniform transfer of the foil layer between the adhesive and the press. However, excessive heat can negatively impact the metallic pigments and chemical bonds within the foil, leading to a reduction in gloss and an undesirable matte effect.
Bo The transfer process requires the adhesive (pat) to be at an optimal temperature for proper bonding. Different adhesives have varying heat requirements, but generally, 130-160°C is needed for activation.
o If the pressing time is too short, the adhesive won’t fully activate, leading to poor adhesion. If the pressing time is too long, excessive heat transfer can cause, weakened adhesion properties and dulling of the foil’s shine.
To maintain consistency, it's essential to monitor the machine’s temperature and duration settings, ensure that fan-assisted machines distribute heat evenly and regularly use heat-sensitive labels for cross-checking heat distribution.
In recent years, heavy metals that are harmful to the environment and human health have been closely monitored in the textile industry. These substances can either be naturally present in raw materials or introduced during various production stages from raw material to finished product. To prevent harmful effects on both human health and the ecological system, global standards have established maximum allowable heavy metal limits.
Since 2019, our products have been certified under OEKO-TEX STANDARD 100. This means our foils are tested annually in Germany against a list of over 1,000 harmful substances. The OEKO-TEX STANDARD 100 criteria catalog includes:
- Heavy Metals: Arsenic (As), Barium (Ba), Cadmium (Cd), Cobalt (Co), Chromium (Cr), Copper (Cu), Mercury (Hg), Nickel (Ni), Lead (Pb), Antimony (Sb), Selenium (Se)
- Restricted Substances: Azo dyes, pentachlorophenol, perfluorinated compounds (PFAS, PFCs)
- Numerous other harmful chemicals, including those not yet legally regulated
- Various environmental substance classes
- Compliance with international regulations, such as: REACH Annex XIV & XVII, US CPSIA (Lead Regulation), EU POP Regulation
- All textile-related substances on the ECHA SVHC Candidate List
The OEKO-TEX Association closely follows European Chemical Regulations (REACH) and the ECHA-SVHC List of Substances of Very High Concern. These regulations include hundreds of components and are evaluated based on OEKO-TEX STANDARD 100 Annex 4 and Annex 7. Additionally, the SVHC Candidate List is continuously assessed by OEKO-TEX experts, focusing on fabrics, textiles, clothing, and accessories. When new relevant substances are identified, they are rapidly incorporated into OEKO-TEX STANDARD 100 requirements and updated accordingly.
In the foil printing process, factors such as foil film, foil adhesive, press pressure and speed, and heat transfer of the press must be applied in harmony. Proper control of these factors ensures a smooth process and the desired durability of the print. Temperature plays a critical role in foil printing by facilitating the homogeneous transfer of the foil film between the adhesive and the press. However, exceeding the optimal temperature range can negatively impact the metallic pigments and chemical bonds within the foil, reducing its gloss and visual appeal.
To achieve optimal transfer, the printing area must reach a specific temperature; otherwise, inconsistencies may occur. The chemical components in the foil adhesive need to be activated before printing, requiring a temperature of 130–160°C, depending on the adhesive's composition and characteristics. Another crucial factor is the heat application duration. If the pressing time is too short, the transferred heat may not be sufficient to fully activate the adhesive. If the pressing time is too long, excessive heat transfer can damage the adhesive properties or cause an unwanted matte effect on the foil.
Ensuring proper heat distribution; to maintain consistency, it is essential to; regularly check temperature and time settings on machinery, ensure fans in heat-assisted machines distribute heat evenly and use heat-sensitive labels for periodic cross-checks, ensuring uniform temperature distribution across the press chamber. By following these guidelines, foil printing can achieve consistent quality, optimal durability, and a visually appealing finish.
Foil printing is typically applied to smooth surfaces with predefined patterns, ensuring exact alignment with the design using piece or roll-to-roll printing methods. However, when unique effects are desired or a handcrafted appearance is preferred over standard background designs, spray or spray gun (pistole) techniques can be used.
This method is mainly applied as a final finishing process on fully sewn and ready-to-wear garments. Unlike conventional printing techniques, the adhesive (pat) used in spray application must be adjusted to a more fluid state for compatibility with the spray gun. The outcome is heavily dependent on the precision and experience of the operator applying the adhesive. This method is especially useful for uneven surfaces such as stitch lines, folded sections, or textured fabrics. If applied carefully, it can yield superior results compared to conventional methods. Unlike stencil-based adhesive transfer, this method allows for highly customized and artistic foil effects.
Ensure even and sufficient distribution of the adhesive across the fabric. Check whether the adhesive penetrates textured areas, such as knit loops, raised fibers, and inner folds. For better adhesion, place custom molds inside the garment before spraying to stabilize the fabric.
Adhesive-coated products are cured at 140°C to dry and set the adhesive. After curing, inspect for cracks or raised areas, as these may cause foil peeling during washing.
The heat press settings should be adjusted as follows: Temperature: 150-160°C, Pressure: 5-6 bar, Pressing Time: Vertical presses: 5-10 seconds and Conveyor presses: 3-5 meters/minute
The foil can be peeled off immediately after pressing or left to cool for enhanced gloss. Delayed peeling typically results in maximum foil shine. By following these guidelines, foil adhesion, durability, and visual appeal can be significantly improved in spray-applied foil printing.
Foils used in printing processes have a delicate structure. The film layer carrying the color and design is peeled off after printing, leaving behind a permanent transfer on the substrate. Despite being just 1 micron thick, this layer consists of four different coatings: release, color, metallic and protective chemical layers.
After foil printing, wash fastness and rub fastness tests are conducted on the products. Although rare, some test results may show partial or complete foil detachment, which negatively impacts the intended added value of the product. If this occurs, a systematic review of the foil printing process is necessary. Every step, from fixation temperature and duration to press temperature, time, and pressure, must be checked to ensure compliance with the correct parameters. If a mistake is identified, corrective actions should be taken.
If foil detachment occurs, the pattern of the defect can reveal whether the issue is with the adhesive (pat), the foil quality, or the printing process.
- No adhesive or foil remains on the surface: The adhesive was not properly fixed or was not suitable for foil transfer.
- Foil has peeled off, but an adhesive residue remains on the surface: The fixation temperature (140-145°C) or press temperature (160°C) was set too high, causing the adhesive to overcure. Check temperature settings on machines and the performance of fans in fan-assisted systems.
- Foil has detached, leaving only a silver layer on the adhesive: The press temperature or duration was insufficient, preventing the adhesive from fully bonding with the foil layers. Alternatively, the foil quality may be defective.
By maintaining the right process conditions and using reliable materials, it is possible to achieve exceptional durability in foil prints, even under demanding washing conditions.
In the foil printing process, several steps are carried out including applying adhesive to the surface, fixation, pressing with heat and pressure and finally separating the carrier film from the foil-transferred product. These steps must be carefully followed from start to finish for a successful outcome. The final stage of the foil transfer process is the separation of the carrier film from the product to which the foil has been transferred.
- After pressing, the foil should be stacked in a well-ventilated area with minimal piling.
- To ensure proper adhesion of the adhesive to the product, a heat of 150-160°C is required during foil transfer.
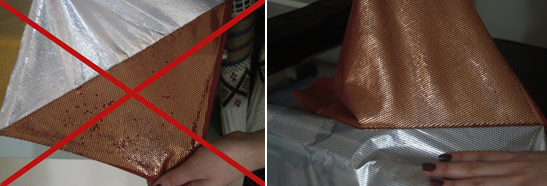
- When the printed product and foil exit the press, they are in a hot and elastic state. Before separating the carrier film, cooling is necessary to enhance the adhesive’s grip on the product and to ensure a homogeneous bond between the foil and the fabric. For this reason, the pressed product should be left at room temperature for 1-2 hours or if possible, cooled at 0-2°C for 1-2 minutes before opening.
- After the cooling phase, the carrier film should be carefully peeled off in accordance with the direction of the fabric's warp and weft threads.
If any residual dust or debris forms during the separation process affecting the appearance of the design, the first preventive measure is to separate the carrier film while keeping the transferred product facing upwards and the peeled film facing downwards. If the issue persists, using an air gun to blow off the dust after separation can help prevent contamination from affecting the product's appearance.
Hot stamping foils are produced by attaching it to a carrier film using a special chemical to allow for easy separation and transfer. The amount or thickness of this separating agent determines a property known as "Separation Hardness." Foils with high separation hardness do not easily detach from the film, even when rubbed by hand. On the other hand, soft foils can come off the film immediately with even slight handling.
This separation resistance which is carefully adjusted during foil production, varies depending on the applied surface and the adhesive pattern density. Foils can be produced in soft, medium-soft, medium, medium-hard, and hard levels. Since different businesses use foils in different ways, on different adhesive patterns and in limited quantities, it is not feasible to stock all hardness levels. For this reason, medium-hard foil production is generally preferred.
A foil that is slightly too hard for applications requiring a soft foil may not adhere well, while a foil that is too soft for applications requiring a hard foil may lead to dusting issues. To avoid such problems, printing companies should carefully select the foil based on their pattern type. If necessary, they should obtain samples from different batches and lots to find the most suitable one.
A foil that is slightly too hard for applications requiring a soft foil may not adhere well, while a foil that is too soft for applications requiring a hard foil may lead to dusting issues. To avoid such problems, printing companies should carefully select the foil based on their pattern type. If necessary, they should obtain samples from different batches and lots to find the most suitable one.
Dusting occurs in delicate patterned foil prints when tiny particles of the foil detach from the edges of the design and transfer onto unwanted areas of the fabric. To prevent this issue, when separating the carrier film from the fabric after printing, the small foil particles should remain on the carrier film rather than sticking to the fabric. This ensures that the print design remains sharp and well-defined. Such issues are most common in halftone (tram) designs with fine and intricate details. For these types of patterns, medium separation hardness foils are recommended.
There are also preventative measures and solutions that can minimize dusting, as outlined below:
- After the printing process, the foil should not be removed immediately. Instead, it should be cooled for 15-20 minutes in accordance with the factory conditions.
- To prevent dusting, the foil should be peeled off in reverse. Normally, the carrier film is pulled away from the fabric, but to minimize dusting, the fabric can be peeled away from the film instead. The printed product should be positioned on top, and the carrier film should be underneath while separating them.
- Depending on the fabric type (knitted, woven, etc.), the foil should be removed in the direction of the fabric grain, pile, or nap. This prevents silvering (dusting) and ensures that any detached particles fall onto the carrier film below rather than onto the printed fabric.
- If dusting still occurs despite all precautions, compressed air or shaking the fabric can be used to remove excess foil particles from the product.
- If the dusting issue persists, using a harder-separating foil is recommended.
If a soft foil has already been used without following these precautions, and dusting-prone products have been obtained, do not attempt to remove excess foil particles by hand. Once the product has completely cooled and the adhesive has cured, the extra foil dust can be removed using a sponge, an air gun, or a lint roller.
Foils should be stored under the following environmental conditions to maintain its quality:
- The ambient temperature should not exceed 25°C and should not drop below -1°C.
- The storage area should be free of humidity and well-ventilated.
- Foils should be protected from direct sunlight (UV rays).
- Loading, unloading, and transportation must be handled with care to prevent any damage, even minor impacts.
When stored under proper conditions, hot stamping foils have a shelf life of up to 5 years.
For products with foil printing, the following factors should be considered during storage:
- Printing methods and effects applied alongside foil printing should be taken into account when determining storage conditions.
- The storage area should be free of dust and air pollution, as airborne particles can contaminate the fabric.
- Since direct sunlight can cause fading in all printed and dyed fabrics, foil-printed surfaces should also be protected from prolonged exposure to sunlight.
- When stacking foil-printed products, proper packaging is crucial. If unpackaged items are stacked excessively, pressure marks may form on the lower layers.
For cleaning foil-printed products, a gentle approach is necessary to preserve their shininess and visual appeal for a longer period.
Despite its delicate and delicate structure and appearance, foil printing allows for a bright and eye-catching finish. To ensure this attractive appearance lasts, the printing process must be meticulously executed. Each business, depending on its capabilities, applies foil printing to various substrates using different machinery and chemicals.
In order to increase the washing fastness to a sufficient level, the points to be taken into consideration when transferring foil to the product in the enterprises are as follows:
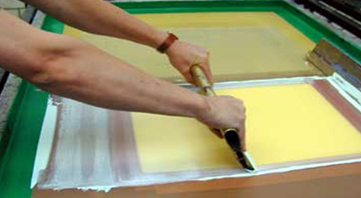
- The appropriate foil adhesive is passed through screen printing molds and carefully applied to the product in a homogeneous manner. During this process, care must be taken to ensure that the adhesive does not dry and harden, clogging the mold's pores.
- The mesh of screen printing plates where foil adhesive will be applied must have larger pores than those used for inkjet printing. For example, if the silk used for inkjet printing is 63-mesh, a 43-mesh silk can be used for foil printing.
- After the glue has been applied to the product, it should be checked to see if it properly covers the inner parts of the fabric's may lines. The even distribution of the glue on the product is a factor that directly affects the permanence of the foil on the surface.
- Glued products are pre-cured and dried in ovens at 140°C. After curing, the glued surfaces where the foil will be transferred should be inspected for cracks or bulges. Such defective surfaces can flake off after washing, resulting in poor wash fastness.
- The glued product that has been fixed is ready for foil transfer.
- For foil transfer, the press temperature should be set as 150-160°C, the press pressure as 5-6 bar and the pressing time as 5-10 seconds in vertical presses and 3-5 meters/minute in conveyor type presses.
- After the foil is pressed, it can be separated from the film by waiting it at 0-2°C for a few minutes. If the release film is removed after waiting at room temperature for about an hour, the foil's gloss can be maximized.
When the entire printing process, detailed above, is meticulously and carefully implemented, the highest level of fastness is achieved. One of the most important factors determining the wash fastness level of foil print is the properties of the foil adhesive used.
The properties of the foil adhesive are more important than the quality of the foil itself when it comes to wash fastness. A detailed examination of the print reveals that the foil layer consists of metallic or matte powder paints held to the surface by the adhesive. The foil adhesive must be strong enough to firmly bond the fabric to these foil layers. Otherwise, even the highest quality foil can easily peel away from the surface during washing.
The most important thing to consider is that the press temperature not be below 150°C. The active ingredient in the binder applied as an adhesive only becomes active at 150°C. This way, the glue exerts its strongest bonding effect between the product and the foil, ensuring complete transfer of the foil to the product. Below this temperature, the foil can still be transferred to the product, but because it is not held together with sufficient strength, the bond will easily loosen during washing, inevitably resulting in lower-than-desired fastness results.
If, despite all these precautions and careful practices, fading problems occur after washing, it is necessary to re-examine the quality level of the foil used.

With advancing technology and rising quality expectations, textile industry standards have become more demanding. Alongside wash fastness tests, rubbing fastness tests are also essential for product acceptance. These tests are conducted in two ways; dry and wet. Since foil-printed products are expected to have high rubbing fastness, achieving this requires careful attention to the printing process and the materials used. Compared to dyeing, printing inherently has lower fastness levels, especially in terms of rubbing fastness. This is due to the fundamental differences in the bonding mechanisms. In dyeing, the color penetrates the material’s molecular structure, forming a strong chemical bond. In printing, the color or coating remains on the fabric’s surface, creating a physical layer rather than integrating with the fiber itself.
If foil printing has even lower rubbing fastness compared to standard pigment printing, check if a layer of adhesive (glue) is applied to the fabric first, the foil is then bonded onto this adhesive-coated surface. The durability of the foil print depends on the quality of the adhesive used, how well the adhesive adheres to the fabric, the application process and curing conditions.
If the rubbing fastness results are unsatisfactory in a crockmeter test, the following factors should be reviewed: Has a surface coating been applied? Is the adhesive suitable for the fabric and printing conditions? Are the printing parameters (temperature, pressure, and curing time) optimal? Adjustments to these factors can significantly enhance rubbing fastness.
Crockmeter Rubbing Fastness Test & Device Usage
The crockmeter is a manual testing device that evaluates how well a printed surface withstands rubbing. The device consists of a test area where friction occurs, a needle-holder for the fabric sample, a friction head that holds the rubbing fabric, a 9N weight bar that applies pressure and a hand crank that moves the friction head back and forth.
The fabric sample is stretched tightly in the test area. (For knitted fabrics, it should be especially taut to prevent stretching during testing) A 5 cm x 5 cm cotton reference fabric is attached to the friction head. For wet rubbing fastness tests: the reference fabric is dampened with distilled water. It is then squeezed to remove excess water, leaving it moist but not dripping. The friction head moves back and forth 10 times over the fabric at 1 stroke per second. After testing: the reference fabric is removed and compared under standard daylight at a 45° angle using a gray scale (ISO 105-A03). For wet rubbing fastness tests, the reference fabric should be dried at a temperature below 60°C before evaluation. Care must be taken to avoid contamination of the tested area with hands or other materials. By following optimal printing parameters and quality adhesive selection, rubbing fastness levels in foil printing can be improved to meet industry standards.
CRYSTAL FOILS
Crystal foils are ready-to-use decorative materials that do not require custom-designed molds, making them ideal for low to medium production quantities. These foils can be applied using various industrial equipment such as hot stamping presses, calendering machines, flatbed or conveyor heat presses. In fact, they can even be transferred with a standard household iron, if desired.
The fundamental requirement for transferring crystal foils onto a substrate is the application of heat and pressure. Unlike traditional foil applications, no additional adhesive is needed, as the foil itself possesses inherent adhesive properties. Therefore, adhesive is not required on the substrate surface prior to application, which contributes to the foil’s excellent wash and rub fastness performance.
Key factors that influence the crystal foil transfer process include:
- Environmental Conditions: Variations in ambient temperature, humidity, and air circulation can directly affect the required press temperature and pressure settings. All environmental factors must be considered and parameters adjusted accordingly to ensure consistent results.
- Foil Thickness and Design: Crystal foils come in a variety of textures, patterns, and thicknesses. For instance, micro-sand designs are lighter, whereas crocodile-style patterns are thicker and heavier. Heavier foils require higher transfer temperatures, longer dwell times, and greater pressure compared to lighter foils. This variance should be taken into account during the transfer process, especially when working with multiple foil types.
- Application Parameters: For Conveyor-type Cylinder Presses apply at 150–160°C, with a speed of 3–5 meters/minute and a pressure of 4–6 bar. For Manual Flat Presses recommended settings are 120–160°C, 5 seconds, and 4–6 bar pressure.
- After the transfer is complete, it is critical to remove the carrier film carefully. The foil must be properly cooled before the film is peeled away to avoid damaging the design. The most effective method is to cool the printed material using a shock cooling process (0–2°C for 1–2 minutes). If shock cooling is not feasible, allowing the item to rest at room temperature for 5–6 hours before peeling will also ensure optimal results. These cooling procedures allow the resin in the foil to solidify and adhere completely to the substrate without any loss in quality.
If an additional metallic foil application is desired on top of the crystal foil, it can be done at 140–150°C for 5 seconds using a heat press. However, the ideal settings should be determined based on the specific equipment and conditions of each production facility.
Due to the thermoplastic nature of crystal foils, it is recommended that the temperature during ironing of finished products does not exceed 150°C to maintain the integrity of the design.
- Crystal foils are predominantly used in continuous-length printing machines, making it essential for the foil to lie flat. Proper tension during feeding is critical to ensure optimal results.
- Crystal foils contain varying amounts of adhesive depending on the design, which directly affects the texture (hand feel) of the final product. Therefore, the foil must be compatible with the weight of the fabric or leather being used. Incompatible foil selection can result in an undesirably stiff or bulky texture.
- Crystal foils are predominantly used in continuous-length printing machines, making it essential for the foil to lie flat. Proper tension during feeding is critical to ensure optimal results.
- One of the most important factors in crystal foil printing is selecting the correct temperature and pressing duration. The energy used during transfer must not be so high that it causes wrinkling of the foil, nor so low that incomplete transfer occurs. In cases of insufficient energy, parts of the foil may not adhere properly. This can often be confirmed if the adhesive appears darker after pressing but before the carrier film is peeled. If the individual foil particles are not clearly visible through the carrier, the temperature may have been inadequate.
- Crystal foils vary in thickness depending on the design and pattern they carry. For example, micro-sand textured foils are lighter in weight, whereas designs like crocodile patterns are significantly heavier. During transfer, these differences necessitate distinct process settings. Lighter foils generally require lower temperatures, lower pressure, shorter dwell times, and faster processing speeds compared to heavier foils. It is crucial to account for these variations when printing multiple designs in the same production run.
- In continuous belt-driven cylinder presses, a temperature range of 150–160°C, a speed of 3–5 meters per minute, and a pressure of 4–6 bar is recommended. For manual flat presses, the advised settings are 120–160°C, 5 seconds, and 4–6 bar pressure. It’s important to note that individual machines may require slight adjustments based on their specifications and condition.
- Due to seasonal changes in temperature and humidity, adjustments to pressing parameters are often necessary. The same crystal design may not yield identical results in summer and winter or under different humidity levels. Therefore, it is vital to monitor environmental conditions and fine-tune temperature and pressure accordingly.
- Another critical phase in crystal foil printing is the removal of the carrier film. The adhesive activated during heat transfer requires sufficient time to cool and re-solidify. Typically, waiting 4–5 hours at room temperature after pressing is adequate. Removing the film too early may cause design distortion, rough texture, or reduced gloss.
- For businesses that find waiting impractical, an inline cooling system with chill rollers can be added to the production line after the press. A shock cooling process (0–2°C for 1–2 minutes) is also effective in ensuring smooth film separation.
- Crystal foils can be used as-is in their original color or overprinted with additional metallic foils as a second layer.
- When printing hot stamping foil on crystal foil-printed fabric or leather, the same process parameters apply. However, depending on fabric texture and whether a light or heavy crystal foil is used, adjustments to the cooling or waiting period may be necessary to achieve optimal transfer.
- If difficulties arise during the printing process, users are encouraged to consult UES Foil Experts for tailored support and technical guidance.
Since hot stamping foils do not possess self-adhesive properties to bond directly to the substrate, an adhesive layer is required to ensure adhesion. Various adhesive materials—ranging from solvent-based to water-based—are used for this purpose. However, these adhesives typically require application via appropriately designed screens, stencils, or engraved rollers. The only exception to this rule is crystal foils.
Crystal foils, on their own, provide a visually appealing effect. When enhanced with hot stamping foil printing—without the need for any additional adhesive—a multi-dimensional and striking aesthetic can be achieved. The combination of crystal foil and hot stamping foil printing maximizes visual richness. Solid-colored hot stamping foils offer one layer of dimension, while patterned (multicolor) hot stamping foils introduce another, continuously meeting the evolving and dynamic demands of the fashion industry.
- In principle, both crystal foil and hot stamping foil layers are transferred to the substrate using heat and pressure. This can be achieved using various industrial methods such as calendar presses, flat presses, or conveyor presses. In continuous belt-driven cylinder presses, the recommended settings are 150–160°C, at a speed of 3–5 meters per minute, and a pressure of 4–6 bar. For manual flat presses, 120–160°C for 5 seconds at 4–6 bar pressure is advised.
- Once the crystal foil has been transferred, the release film must be carefully removed. Proper cooling is essential before separation; otherwise, defects may occur in the transferred design. For optimal results, post-transfer cooling should be done either via shock cooling at 0–2°C for 1–2 minutes or, if such equipment is not available, by allowing the material to rest at room temperature for 5–6 hours before removing the film.
- Hot stamping foil printing is applied to the crystal foil-transferred surface using a process similar to the original crystal foil application. The key difference in hot stamping foil printing is that no additional cooling step is required after the transfer.
Although crystal foils are more commonly used in the leather industry, they are increasingly preferred in textile printing due to their ability to add a unique dimension, offer cost-effective ready-made patterns, and deliver attractive visual effects. Transparent crystal foils applied to fabric surfaces create a sequin-like effect without the need for any additional processing, adding a distinctive appeal to the final product. Furthermore, when combined with hot stamping foil printing, they achieve a particularly sophisticated and eye-catching appearance.
Foil patterns applied with crystal foils can achieve excellent levels of wash, dry-cleaning, and rub fastness. Compared to other adhesive-based materials used for pattern creation in textile printing, crystal foils stand out as the group with the highest fastness performance.
Unlike conventional foils, crystal foils are produced with a different raw material composition. Their primary component is a resin-based compound, which allows for strong adhesion to the surface using only heat and pressure—without the need for additional chemical binders. Thanks to their resinous nature, crystal foils possess a smooth, water-repellent structure, resulting in outstanding wash and rub fastness.
Due to their thermoplastic properties, it is recommended that printed products using crystal foils not be ironed at temperatures exceeding 150°C.
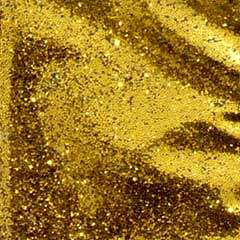
GLITTERS
Glitter is a widely used decorative element in today's textile printing industry. Visually glitter, mica powder and pearl printings can appear similar, making them difficult to distinguish at times. However, despite their visual resemblance, glitter printing stands out by offering a more intense shine and sparkle. Generally, glitters are composed of metallic pigments bonded to a polyester film. Their hexagonal cross-section enhances their brilliance and reflective qualities.


Glitter, which adds rich visual appeal to products, can be applied using different techniques depending on the desired result. Essentially, there are two main application methods:
- Sprinkling Method: Glitter is sprinkled over a printed adhesive paste that defines the intended design
- Mixed Paste Method: Glitter is mixed directly into a transparent adhesive paste at concentrations of 15% to 30%, then applied using screens prepared with the desired pattern.
Each of these methods aims to achieve several key objectives:
- Strong adhesion of glitter to the base material
- Retention of color and shine without any loss
- Prevention of glitter flaking or shedding during use
The wash and rub fastness of glitter prints are directly related to the quality of the adhesive paste used and the effectiveness of the fixation process.
Glitter Printing using the Mixed Paste Method
The screens used in this technique are the same as those used in flatbed printing, but made with a coarser mesh (No. 23) to accommodate the glitter particles. The fabric is placed on the printing table and secured with adhesive to prevent movement. The screen is aligned with the fabric, and the glitter-infused paste is poured onto the screen. Using a squeegee, the paste is evenly transferred through the screen onto the fabric.
Adhesion to the fabric is achieved via special adhesive pastes. Depending on customer expectations and specific product requirements, various types of paste may be used. Each paste formulation requires careful consideration of specific process parameters. Failure to meet these criteria may result in subpar sparkle, poor durability, or insufficient adhesion. Therefore, when using water-based pastes, it is recommended to fix the print at 160–170°C for 5 minutes to ensure optimal bonding.
Glitter Printing using the Sprinkling Method
This method also employs pre-prepared screens with the desired design. The fabric is positioned on the printing table and the adhesive paste is applied through the screen using a squeegee. After the design is printed, glitter powder in the desired color is sprinkled over the adhesive areas. Excess glitter that does not adhere to the paste is then shaken off the fabric. Compared to the mixed paste method, the sprinkling technique typically results in a brighter and more sparkly finish. However, adhesion to the surface is generally weaker, making the design more susceptible to wear over time.
For optimal results in glitter printing, the following fixation conditions are recommended based on the type of adhesive paste used during the transfer process:
- Water-based pastes: Fix at 160–170°C for 5 minutes
- Oil-based pastes: Fix at 150–160°C for 5 minutes
- Solvent-based pastes: Fix at 130–150°C for 5 minutes
To enhance the glitter’s resistance to heat and solvent-based pastes in industrial applications, a 2% addition of a heat-reducing crosslinking fixative can be used.
While these guidelines serve as general recommendations, adjustments may be necessary based on specific production conditions and the properties of the material being printed. Tailoring the parameters accordingly ensures optimal performance and durability of the glitter print.
CAVIAR BEADS
Caviar (bead) printing is a specialized, dimensional printing technique where adhesive is first applied to the fabric in a specific pattern, followed by the sprinkling of caviar beads to create a raised, textured design. This printing method is commonly used on women’s apparel and evening wear fabrics.
The print is colored through the beads themselves, which are available in a wide range of shades. These colors are achieved through a standardized dyeing process, offering a broad palette without limitations on customization.
As a dimensional printing technique, the durability of caviar prints—particularly their wash and rub fastness— depends heavily on the quality of the adhesive and the effectiveness of the fixation process.
Proper attention to these factors minimizes the risk of bead detachment during use.
Transferring the Adhesive
Caviar printing works by adhering the beads to the fabric surface. To do this, a screen printing stencil is used to apply a transparent adhesive only to the areas where beads are intended.
The screens used are the same as those in flatbed printing, and pre-prepared, exposed stencils with the desired pattern are typically used.
Caviar Printing Process
- Preparation: The fabric is positioned on the printing table.
- Adhesive Application: The adhesive is poured into the stencil and applied to the fabric using a squeegee.
- Bead Application: Beads are sprinkled onto the adhesive-covered areas, starting from one edge.
- Bead Distribution: By slightly lifting the fabric from the edge where beads were first applied, the beads are rolled over the adhesive pattern, adhering as they make contact.
- Bead Pressing: Once the beads are applied, they are gently pressed from the reverse side of the fabric using a flat board (e.g., cardboard or plastic) to enhance adhesion.
- If done manually, pressure should be light and not spread across the design. Instead, use a lift-and-press motion to prevent dislodging the beads or distorting the pattern.
- Fixation: To finalize the process and ensure permanence, the fabric undergoes a heat fixation step to fully secure the beads.
In addition to the standard caviar printing method, two advanced techniques can be applied to create unique effects:
- Heat Embossing with Teflon: After the standard print, a Teflon-coated surface is used to apply heat to the beaded area, partially or fully melting the beads and creating a new textural finish.
- Foil Printing Over Beads: Once the caviar application is complete, the bead-covered surface can be used as a base for foil transfer. This adds a reflective layer to the dimensional surface, resulting in a highly decorative and eye-catching design.
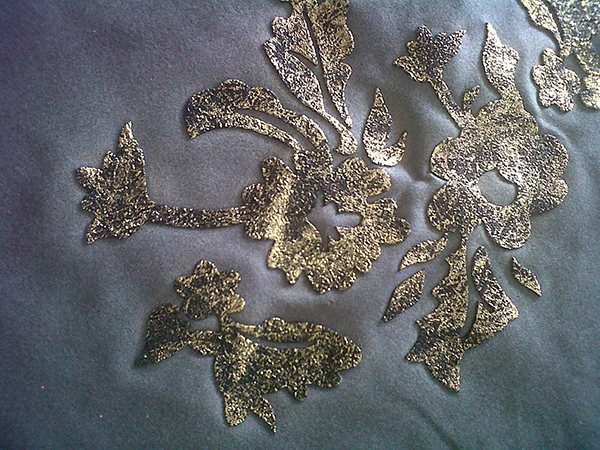
PHOTO EMULSIONS
The screen preparation environment should be dimly lit or illuminated with yellow light. The preparation process consists of the following stages:
1. Coating the Screen with Emulsion: The mesh must be thoroughly cleaned to remove dust and particles before applying the emulsion. To coat the mesh, the screen should be held at a 60° angle. The emulsion is applied from bottom to top using a scoop coater with light pressure—twice on the outside, then the inside is coated in the same manner. If a thicker emulsion layer is desired, the process can be repeated one or two more times on both sides, removing any excess from the interior and exterior surfaces.
Once coated, the screen should be dried horizontally in a drying cabinet with the inner side facing upward, at a temperature up to 40°C. Dried but unexposed screens can be stored in a dark room for up to 10 days. However, if stored for long periods, the emulsion may absorb moisture, so it is recommended to re-dry the screen before exposure.
2. Exposure: Accurate exposure is critical for achieving high resolution, sharp edges, and long stencil life. Exposure time may vary depending on several factors: the power of the light source, the clarity of the exposure unit’s glass, the quality of the positive film, the thickness of the emulsion coating, the mesh count, and the halftone detail of the design. These variables differ across production environments and should be tested to determine optimal exposure settings.
3. Developing the Screen (Image Opening): The screen is washed with cold or lukewarm water (not exceeding 40°C) from both sides using a spray to reveal the design clearly and precisely.
4. Drying: After development, the screen is dried in a horizontal position with the outer side facing down in a drying cabinet at 30–40°C for 15–20 minutes.
5. Retouching: Place the dried screen under white or yellow light to inspect for any pinholes or imperfections. Dust particles on the mesh, film, or exposure glass can cause small openings in the stencil. These should be retouched using emulsion to fully seal them.
6. Post-Exposure (Emulsion Curing): After retouching, the screen is re-exposed on the exposure unit for 15–20 minutes on both sides to fully cure the emulsion and ensure it is no longer photosensitive.
7. Hardener Application: To prepare the screen for high-volume production, a hardener (e.g., HARDENER-AB) is applied with a sponge to the screen surface. After allowing time for vapors to dissipate at room temperature, the screen is dried in a 40°C cabinet. This process significantly increases abrasion resistance.The screen is now ready for high-volume printing and can withstand various types of inks and printing materials.
MURAKAMI WSR, is a diazo-photopolymer emulsion formulated for screen preparation. It is designed for textile printing and is highly resistant to both water-based and plastisol inks
When combined with HARDENER-AB, the screen achieves maximum durability and resistance to wear during production.
Discharge printing is based on the principle of selectively removing or altering the dye from pre-dyed fabrics to create a design. In this process, a discharge paste—containing chemical agents that break down the fabric’s base dye—is printed onto the fabric. As a result, the dyed color is removed or altered in specific areas, forming visible patterns. This method is known as discharge printing.
The discharge paste typically contains dechlorin and is solvent-based, giving it strong stripping and corrosive properties. Because of these characteristics, the printing paste can significantly wear down the screen mesh compared to other printing techniques.
If the discharge paste is not formulated within the correct standards—particularly in terms of the ratios of its stripping and corrosive components—or if the screen has not been properly prepared to withstand discharge printing, the screen may deteriorate during the printing process.
To ensure durability, screens intended for discharge printing must be prepared with accurate exposure times and proper hardener application to form a resilient protective layer. Inadequately prepared screens are prone to wear and stencil breakdown during production, which can negatively impact operational efficiency. To achieve high printing performance and enable high-volume production, every step of the screen preparation process must be carried out meticulously when preparing screens for discharge printing.
